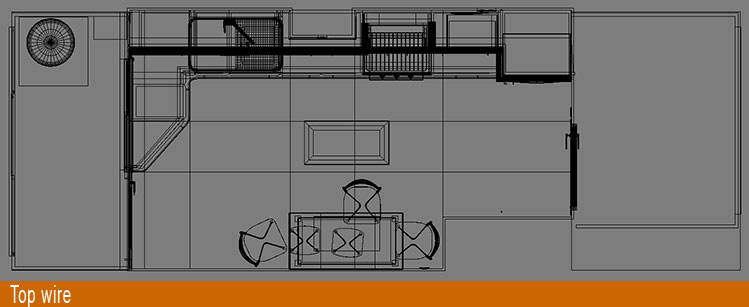
The main structure of the kitchen is a rectangle, done from splines, then the floor and ceiling from Basic planes. There is no much about it. The first thing I wanted to fix was the room itself, I mean, walls, floor, ceiling, with the window hole, and so.
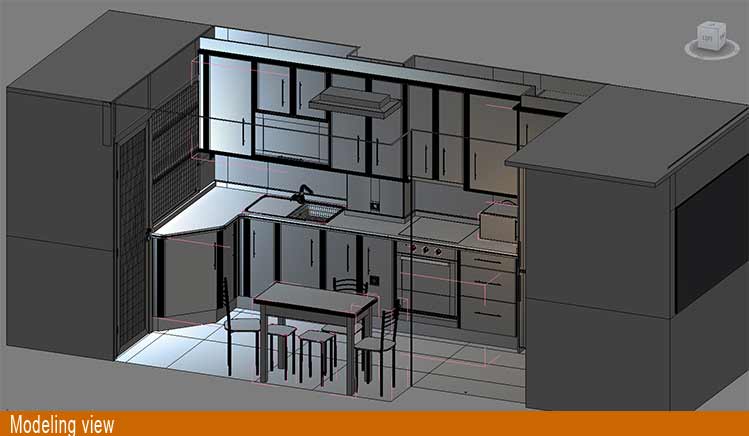
The kitchen cupboards:
All that cupboards are done with a spline to get the rounded shape of the doors, and then converted to poly, and extruded till the desired size. There are almos identical all doors so the process was very simple. I modelled some boxes behind them, just to be sure that they would look good at the borders.

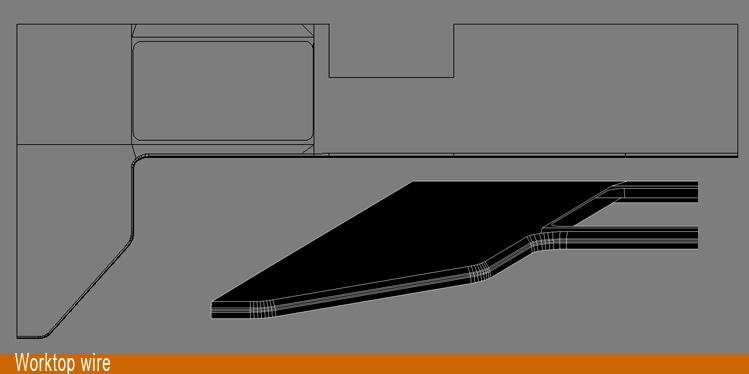
The granite worktop:
Here I made a spline from the top view, with the desired shape. Then convert to poly, and extrude. Now, I charmfer some edges to give rounded corner, and also with the extruded part because I did not want sharp borders.
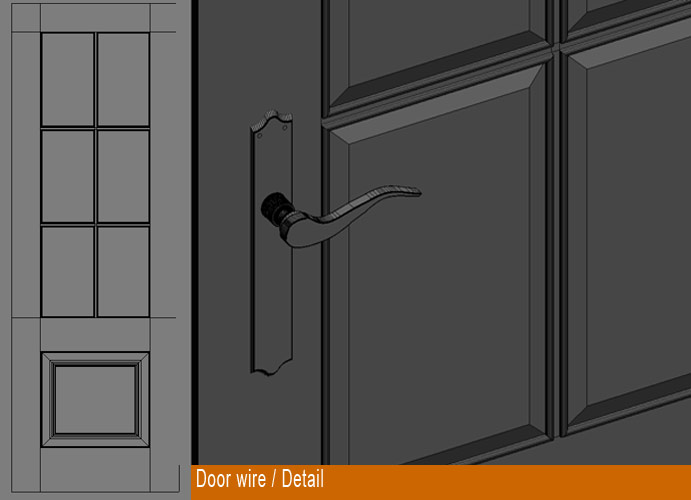
The door:
Just made a plane, and made cuts where i needed. To mark the glass holes, and so. Then I extruded the plane just in the polygons needed, giving depth to the door. The rest of the process was charmfer here and there, some details. Then duplicate the result, cause it is half door only and attached to the other part. Now the door is complete with exactly the same shape front and back.
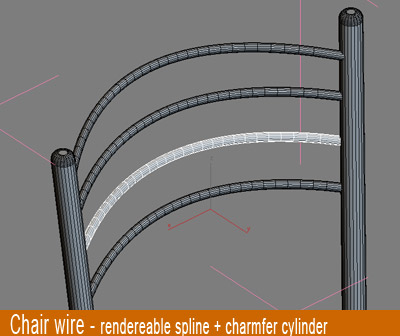
The table & chairs:
The table is a charmfer box. Well, in fact they are 2, one over the other. The chair back was done with 2 cylinders, and then connected with rendered splines curved. The seat is again a spline from the top view, and extruded.

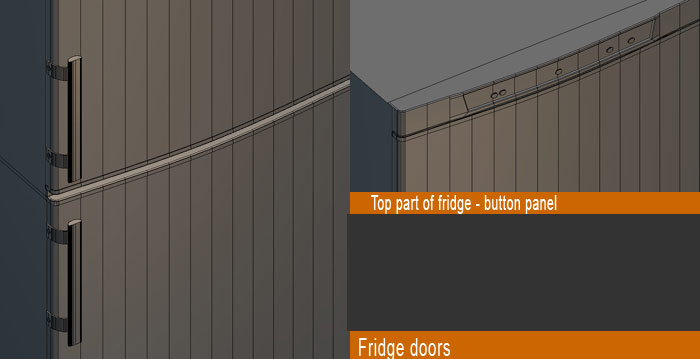
The fridge:
As most of things, are splines to get the shape, then converted to poly, and extruded. This process repeats in much of things
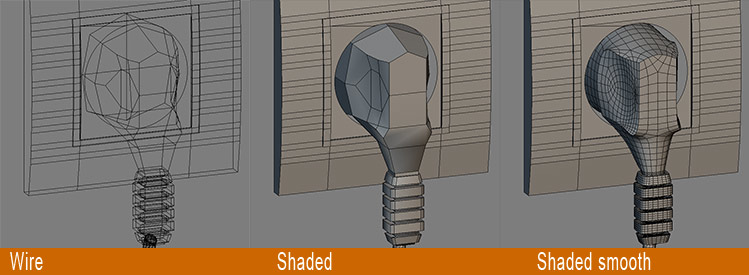
The electric plug:
A cylinder, with a few subdivisions, and then convert to poly. Then move polygons, edges, and vertex till I got the shape more or less. Finally, turbosmooth added, using smoothing groups in some parts, not to smooth the whole thing. The wire is a rendered spline.
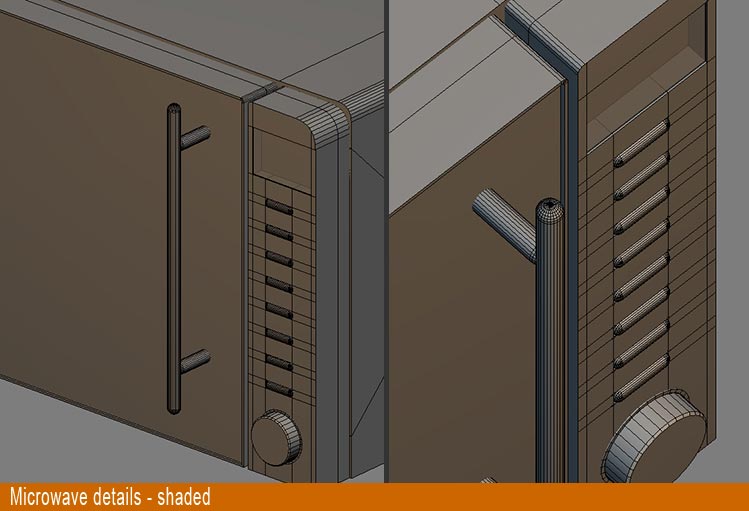
The microwave:
Begin with a box. Then various cuts, to do the door and panel area. The buttons are half charmfer cylinders. Really the micro is a simple thing.
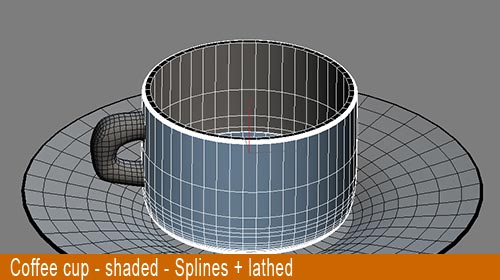
The coffee pot:
The top part is a cylinder, very flat, converted to poly, and extruding some polys. The asa, a box, and move, extrude polygons, and then smooth the result. The low part, is just a spline, lathed. The coffee cup was done with splines lathed.
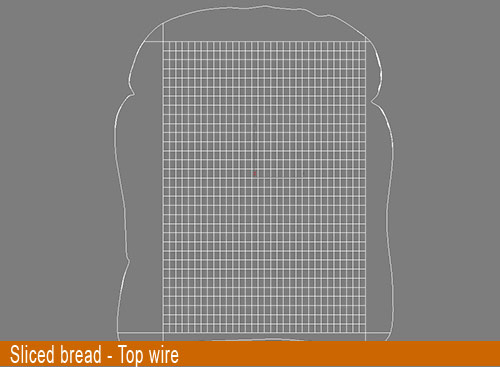
The sliced bread:
With a spline I did the shape in the top view. Then convert to poly and extrude it. I was very carefully with vertex, so as I can have them just when I wanted. The front part, was subdivided to give some variation moving vertex. The jam is a plane, converted to poly, and i moved vertex and edges to give some irregular shape.

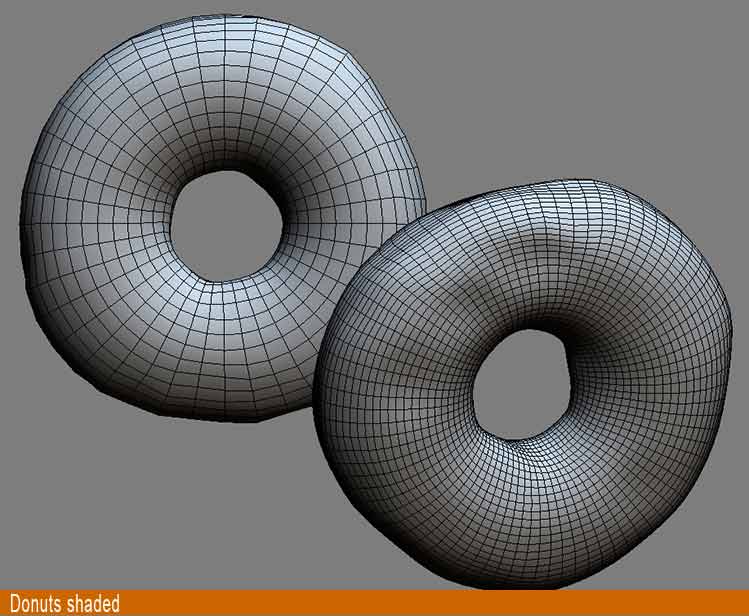
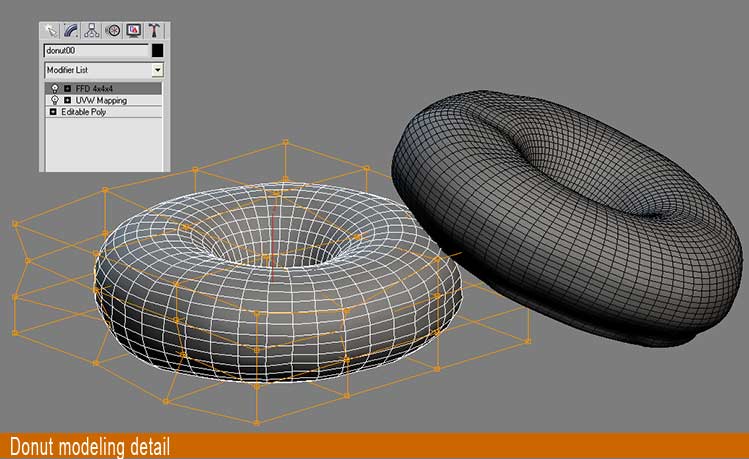
The donuts:
Begin with a torus. Then convert to poly. Now I added 4x4x4 FFD modifier to give some irregularity. With the chocolate one, was a little different, I chose moving some vertex and edges over the editable poly object, and directly add turbosmooth. I wanted a more smooth look in that one. After that, with edit poly modifier, I move some vertex with soft selection, to give some variation..
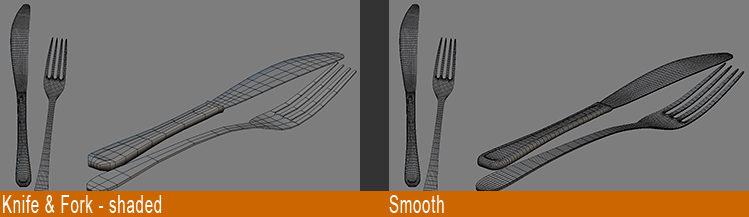
The knife and forks:
Begin with a box, with 4 segments or so. And convert to poly. Then over a reference blueprint, I just went into extruding, scaling, moving, till the shape was more or less finished. It is a slow process, to make the model fit with the real shape. Then, turbosmooth with smoothing groups, to maintain some of the original shape.
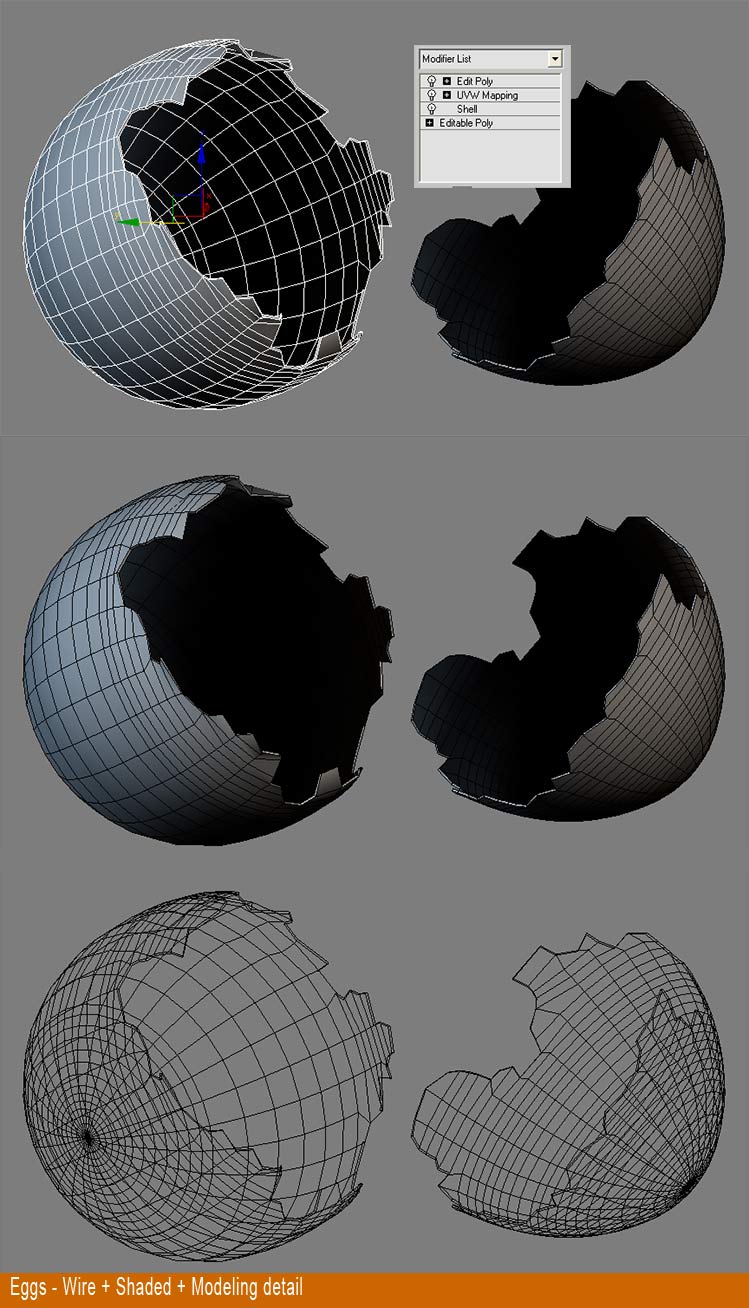
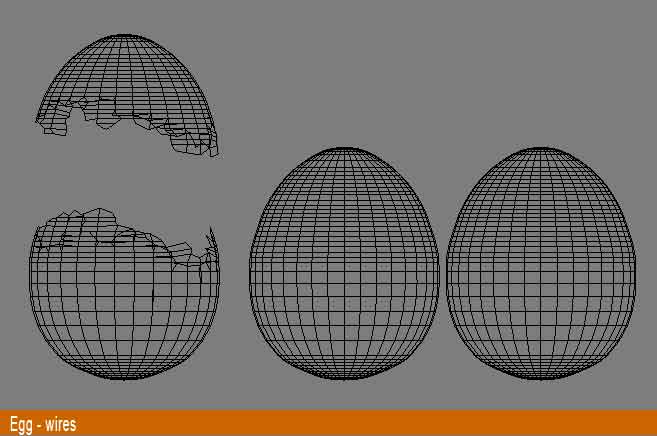
The eggs:
Well, the eggs are simple spline lathed. I used it instead of sphere , to give more control to the shape, as well as I did not wanted a perfect sphere. Of course. The broken egg: I apply turbosmooth, and then selected some half egg. But not perfect half .cause the broken effect should not be a perfect line. I detached each part. And move the vertex around the broken line to give a bit of realism. Then I applied a shell modifier.
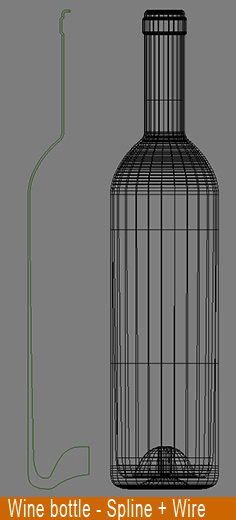
The wine bottle:
Spline, and lathed. Very simple, though it is important to set well the vertex. Later, it would be useful. By example, I used them to make reference where the label should be, and so.
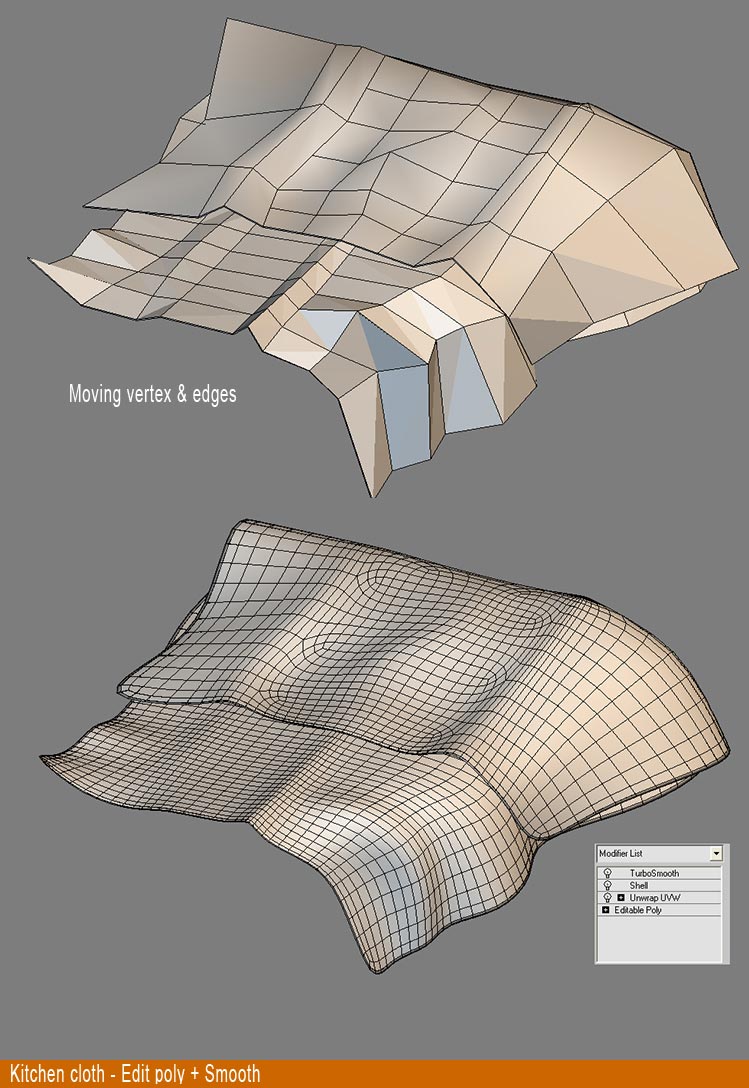
The kitchen cloth:
I did a plane. With few subdivs. Then moved vertex and edges manually. To give the form I desired. Why not use a cloth simulation? Well I began with it, but finally I did this way to take more control over the mesh. So I manually built the shape and applied turbosmooth at last. With some splines, I put some little detail in the low part. It was not a new one. ?